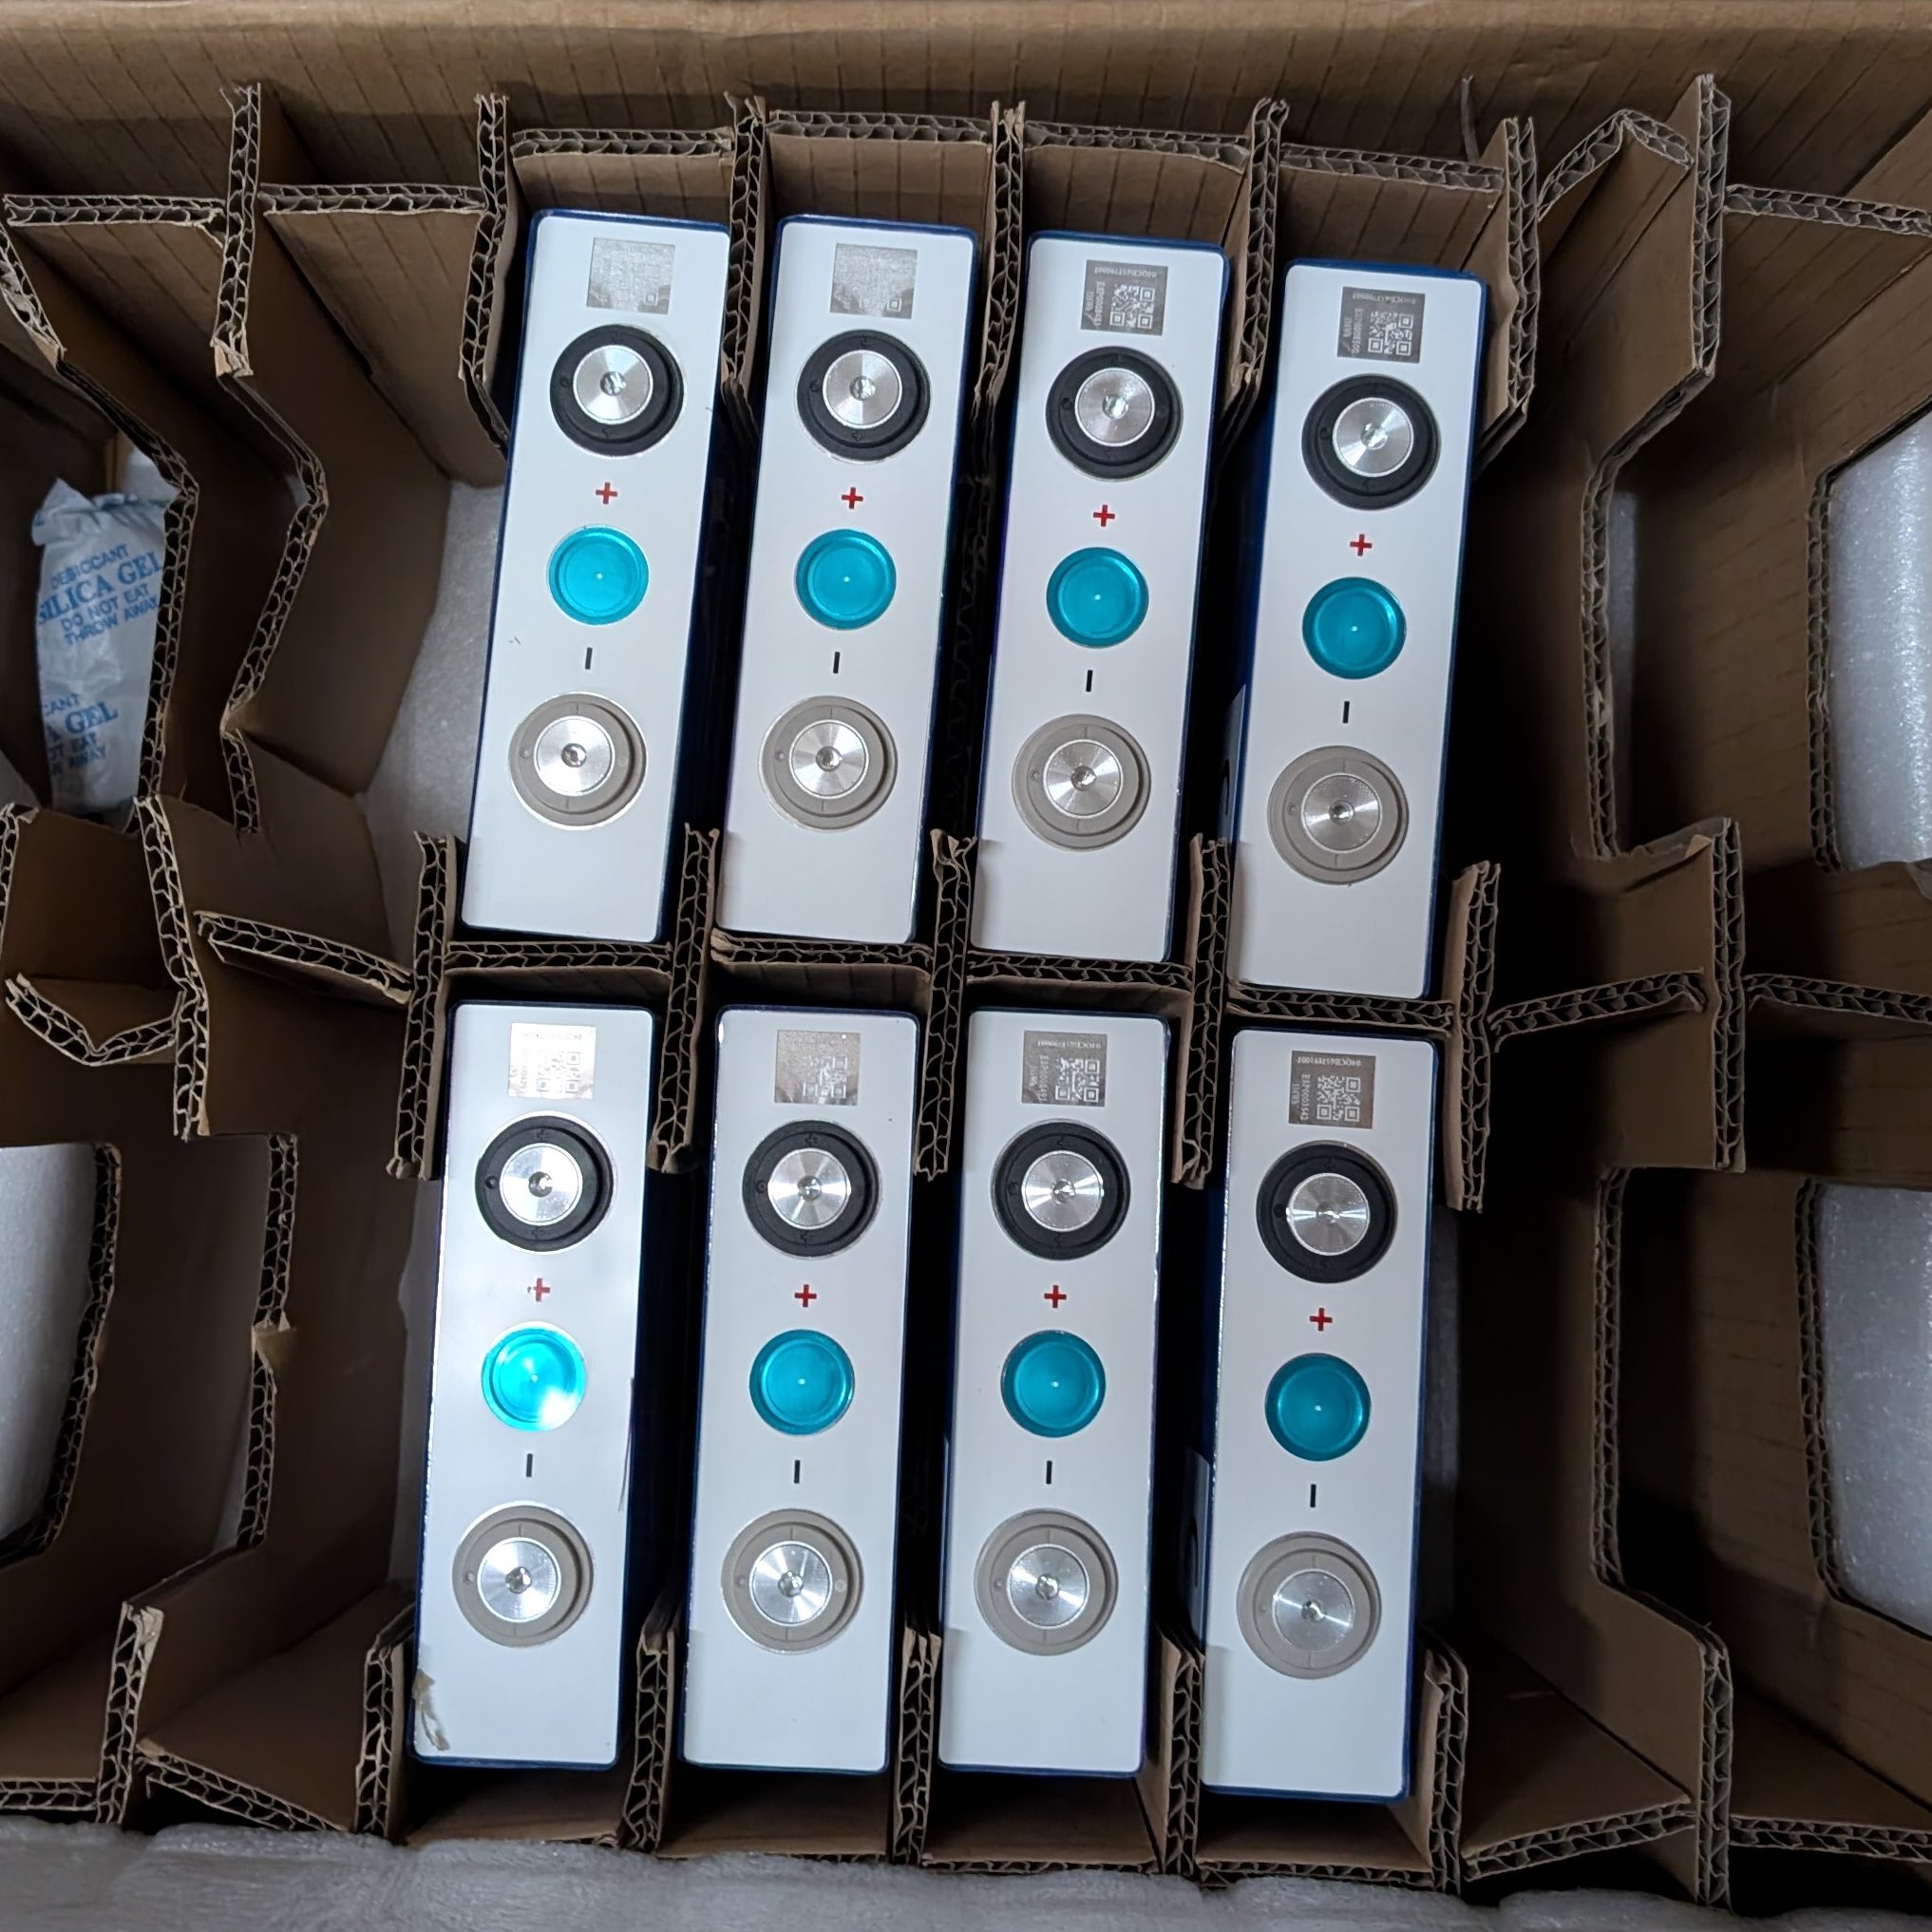
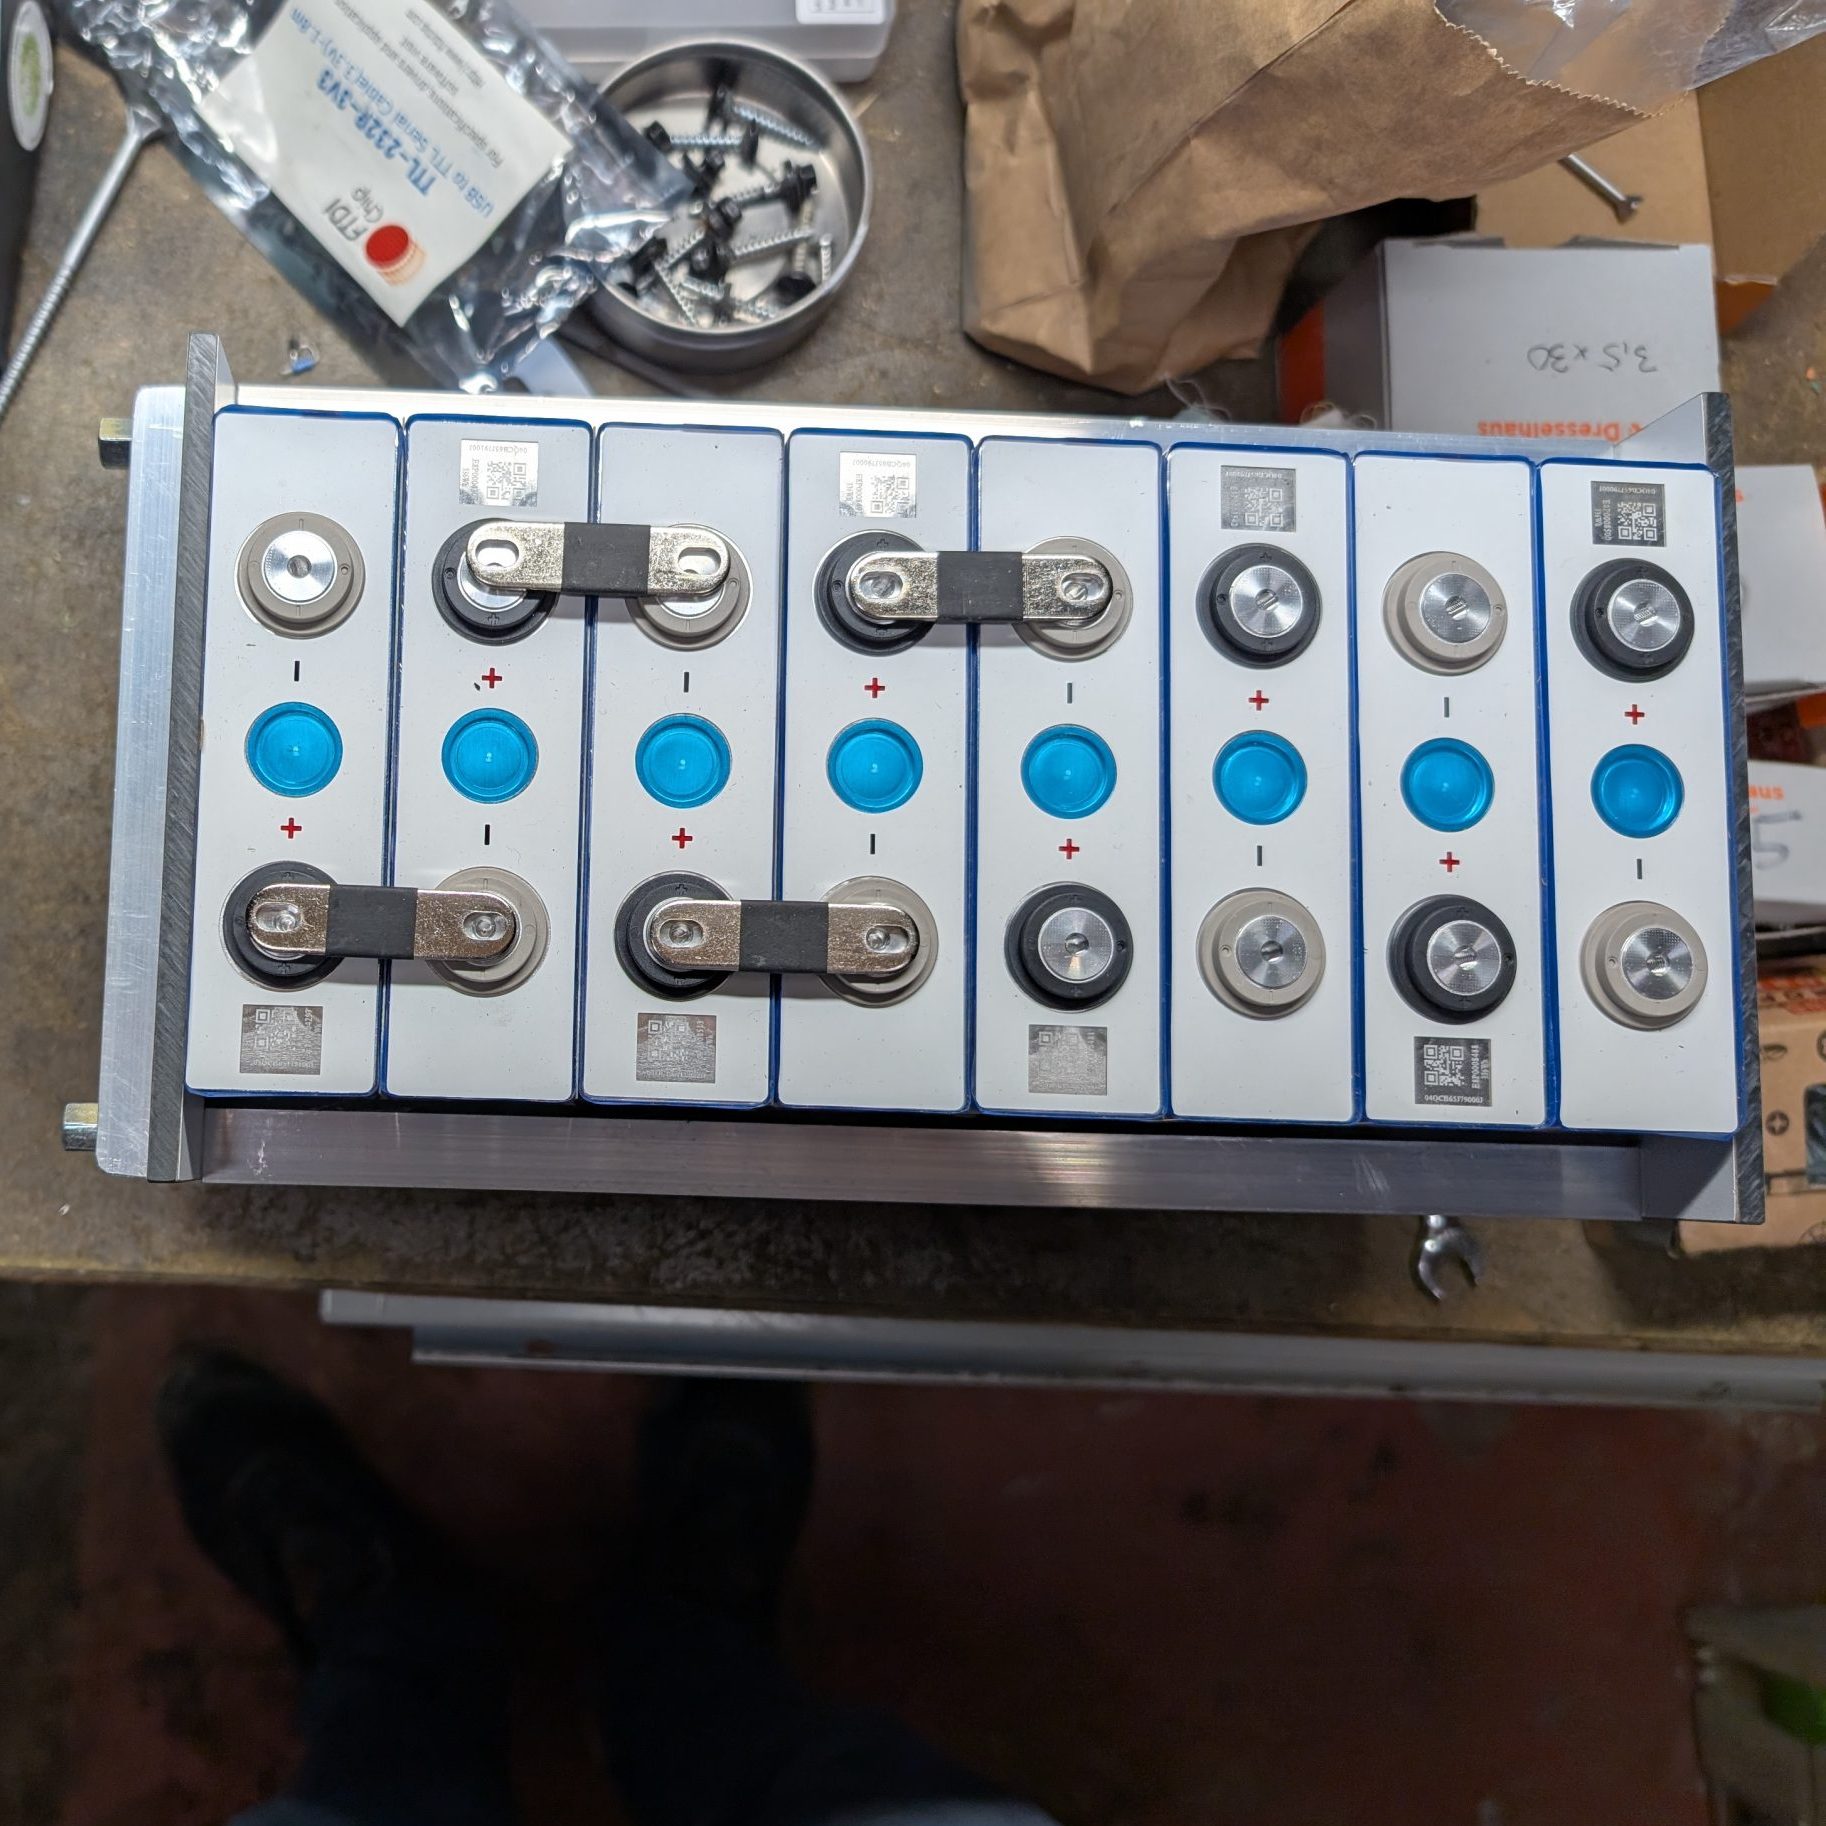
With the motor working, next step of the upgrade was to upgrade the battery pack from 24 V to 48 V. A second set of eight Eve LF105 LiFePO4 batteries was ordered from NKON. This time, I had the blueprint for how to build a pack with rails, isolator plates etc.
Though, this time I had to solve the battery box problem. The original compartment for mounting lead acid batteries are pretty roomy. But because I have no experience in what environment the batteries can endure, I wanted a dry and vibration free mounting. That means foam and and a sealed container. I also knew (this time by experience) that one should never try to squeeze things together. We are talking about sturdy cables and high currents so the bigger the better.
The design decision was to weld a metal box that fits nicely into the battery compartment. Some quick calculations told me that a container out of 2 mm steel would weight around 17 kg. That more than the full battery pack! At least it would be sturdy, and water protected (if galvanized). Still, too much weight!
The same container made out of 3 mm aluminum would only be 9 kg. Interesting, but one problem. I don’t know how to weld aluminum and I don’t have the equipment.
What a great opportunity to learn something new :)
I choose not to include all my ventures into this area but a short conclusion is: No, the cheap stuff from China isn’t worth it.
In the end, I got the Chinese welder to perform pretty well but that was after rebuilding parts of it related to gas flow. This was not a problem with my individual machine but a major design flaw. As a result I spent hours and hours and money (argon gas) trying to learn something with bad equipment.
The positive outcome is that I got hooked enough to buy a nice, used, quality AC/DC TIG welder! I’ve always wanted to be able to weld aluminum!
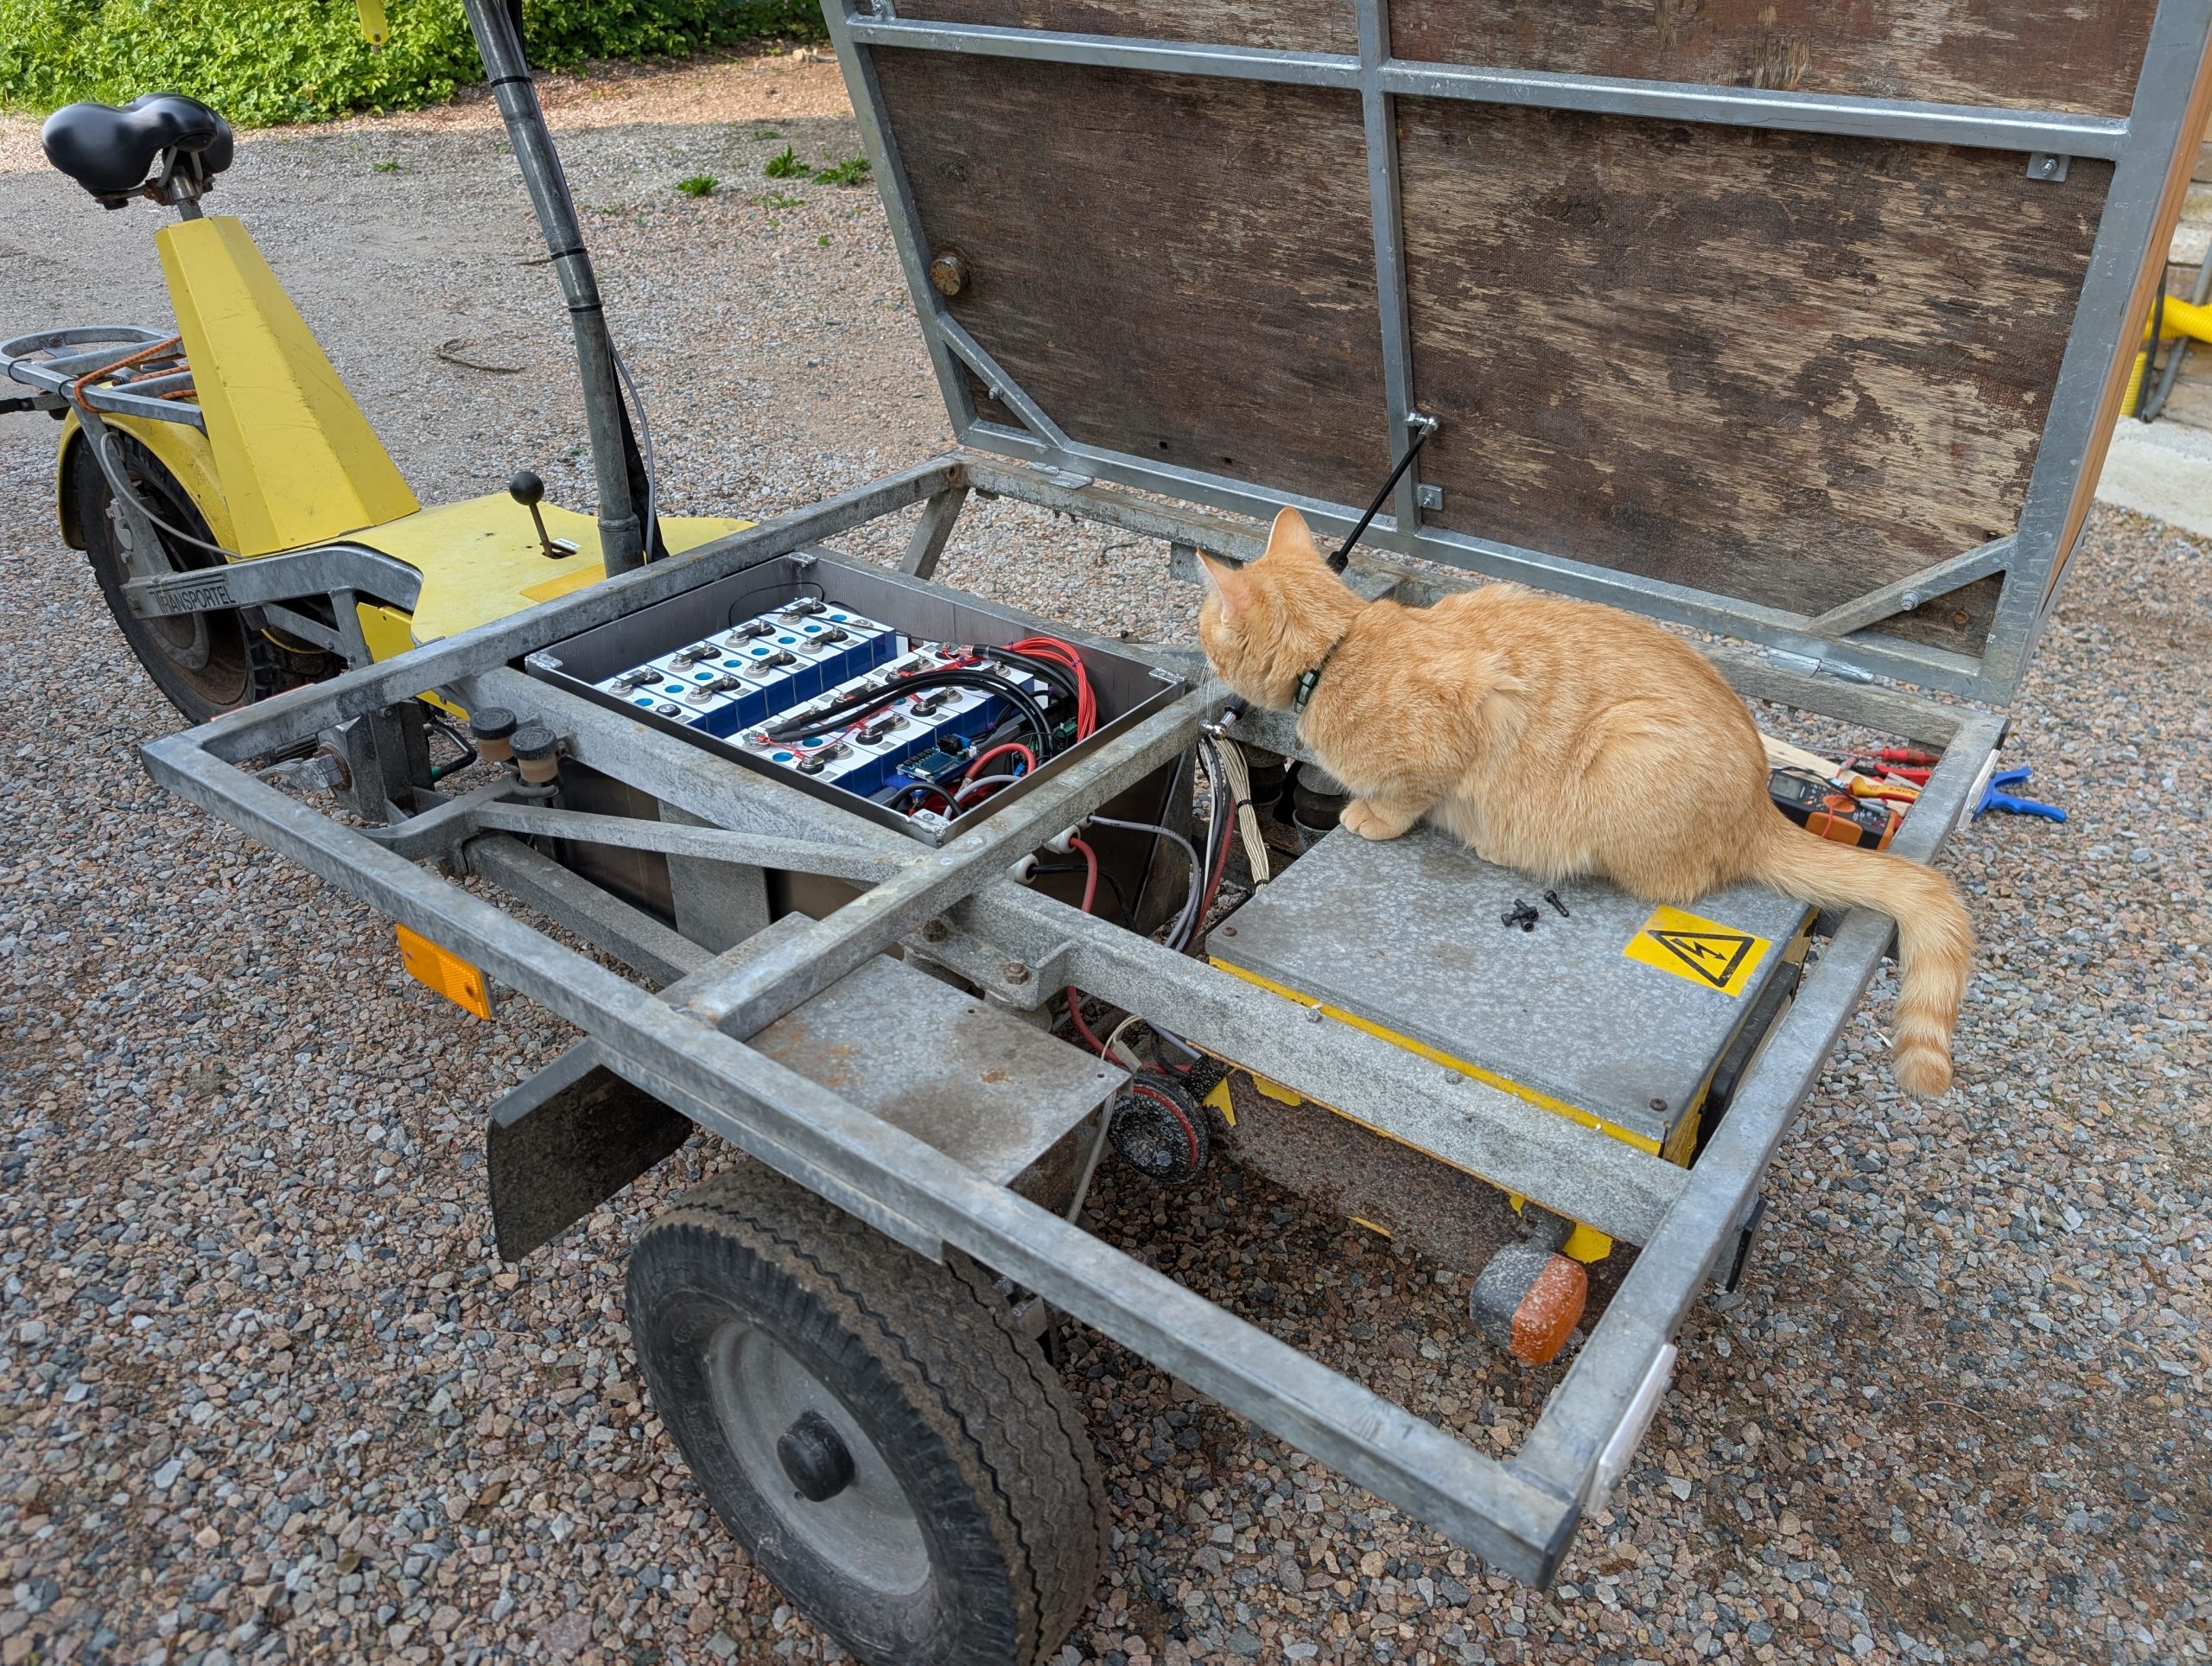
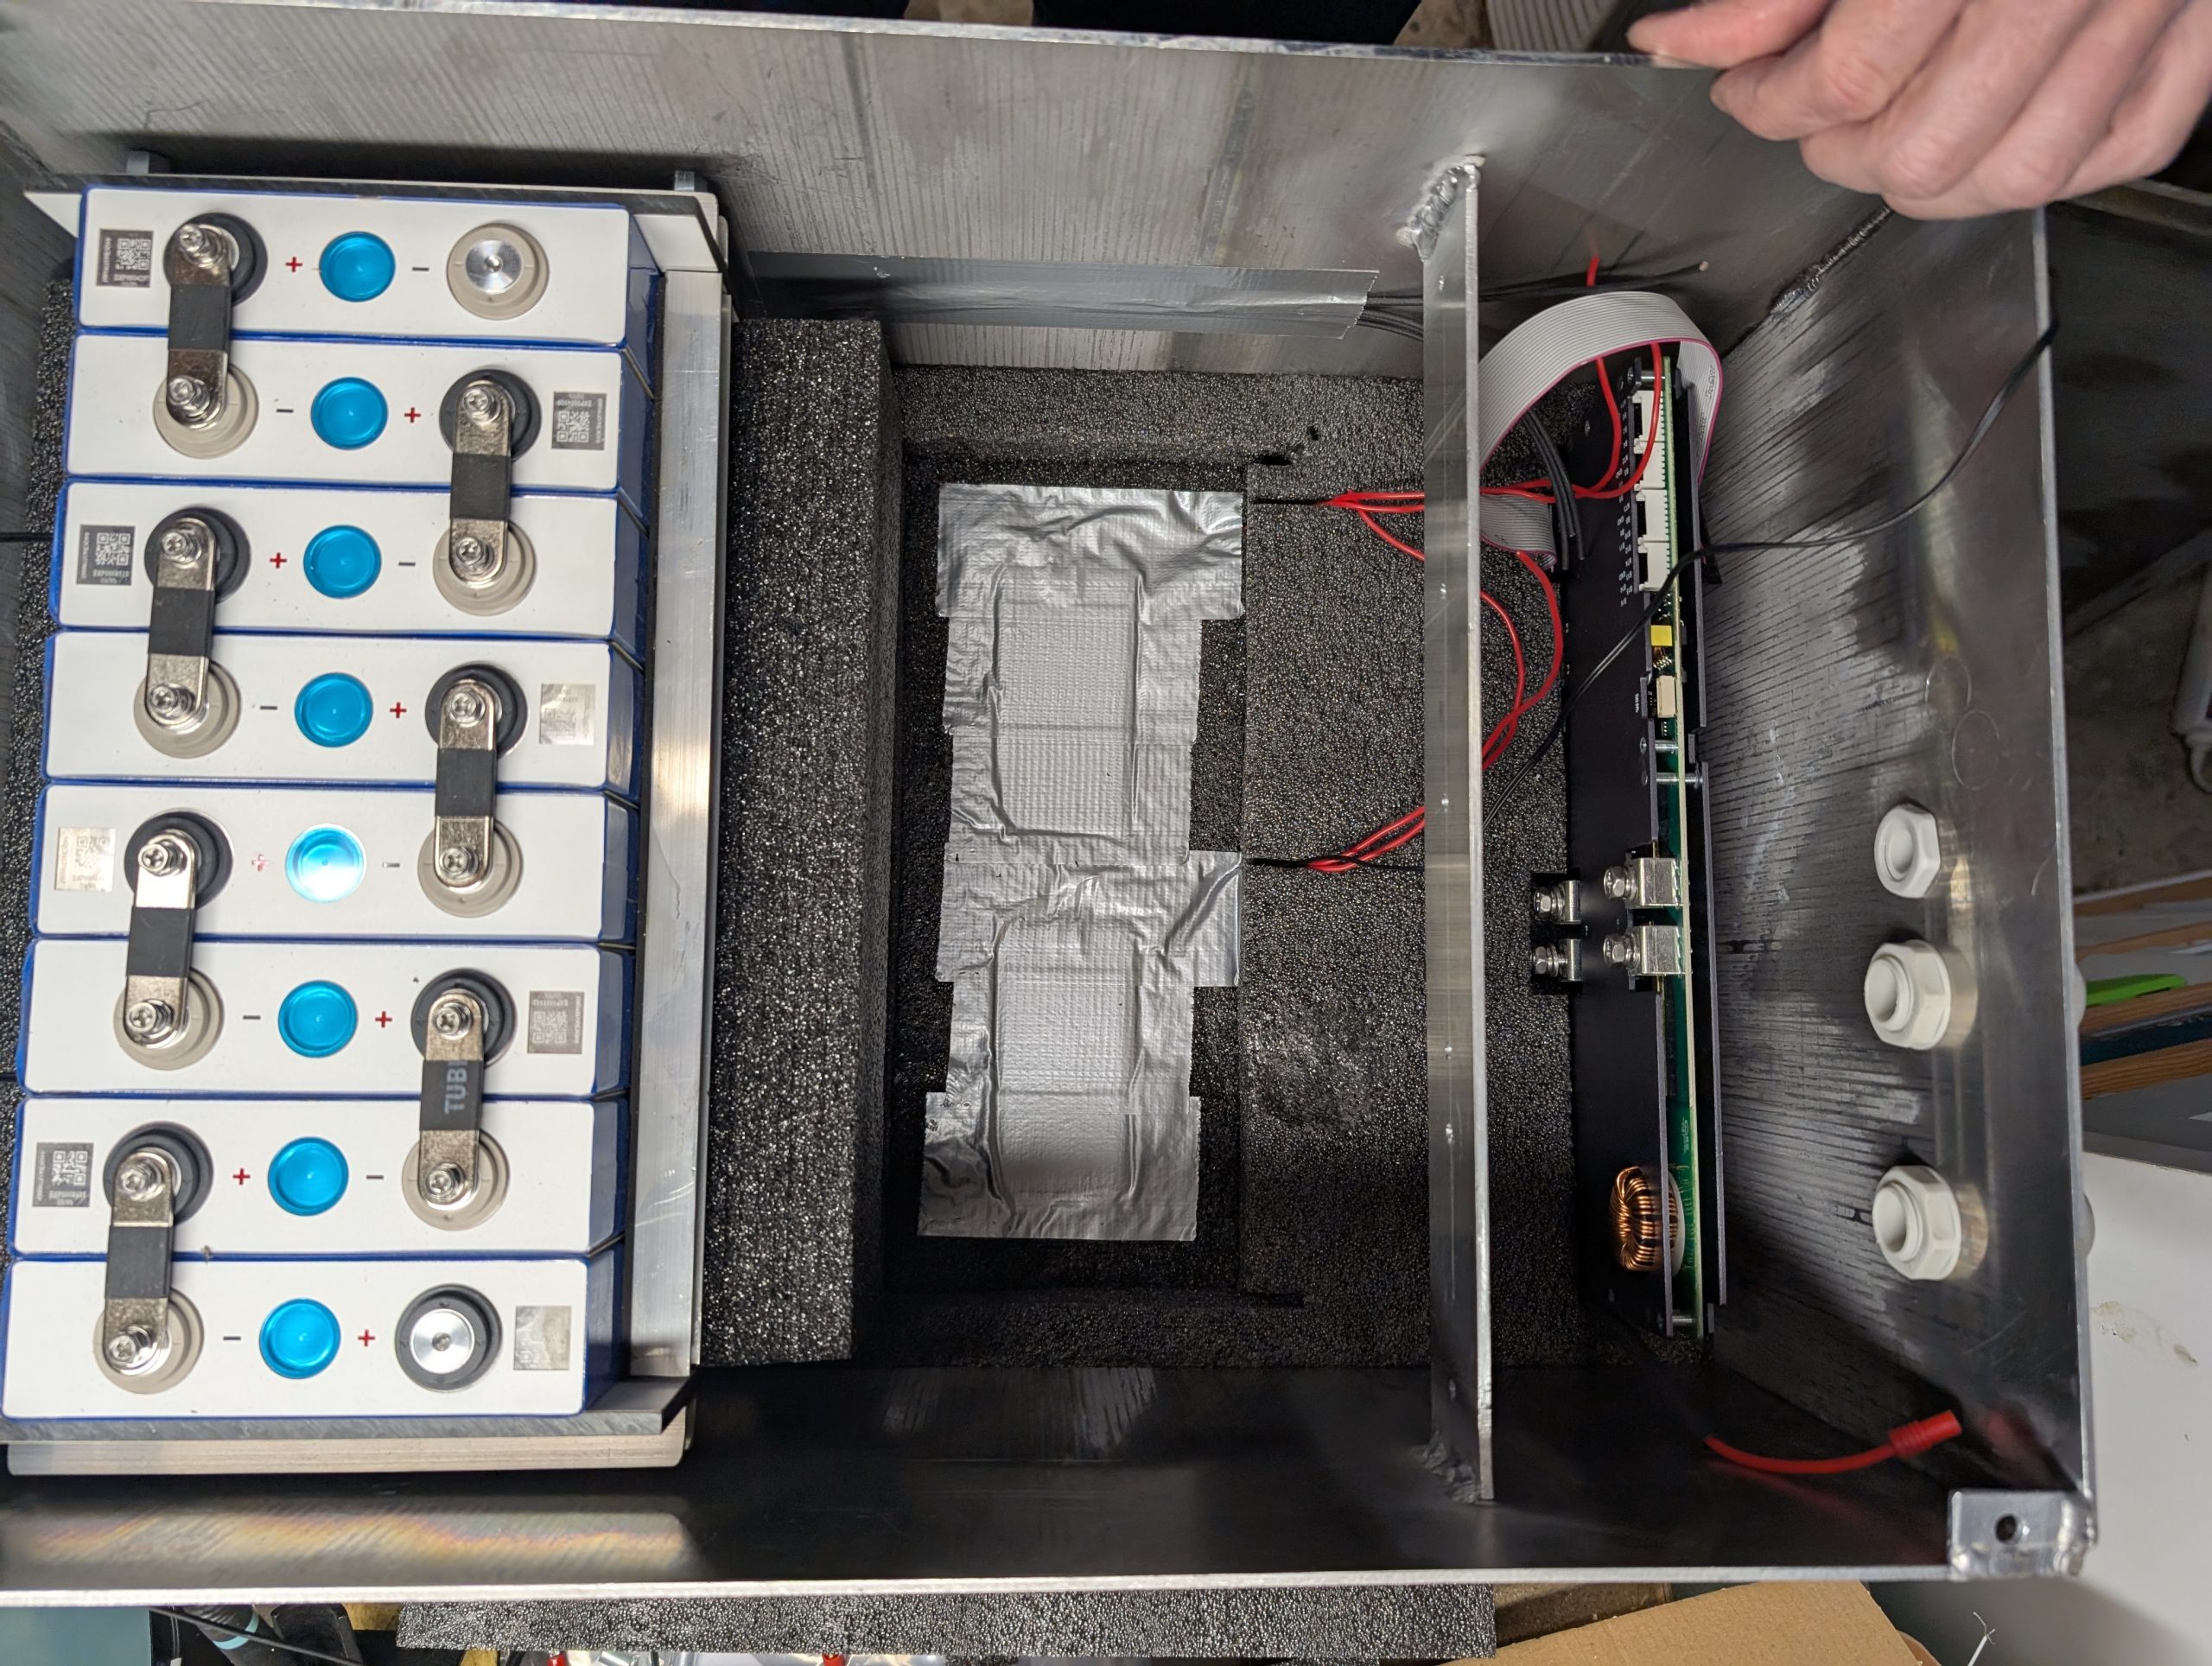
Battery box came out ugly (but usable) due to the problems mentioned. It fits perfectly into the battery compartment and it is just roomy enough to house the BMS and related electronics.
The original 24 V wiring was something like 16 mm2 but there were obvious losses because the wires heated up during driving. After reviewing tables for golf carts I went for 35 mm2 to limit the losses. I found out that most cheap cable lugs seemed to be made of thing copper not providing the full cross-section area of the cable it is designed for. I went for the more expensive ones. To crimp the lugs I tried cheap crimping pliers from Amazon. Useless, sent them back. Instead I found a hammer-operated press working pretty well.

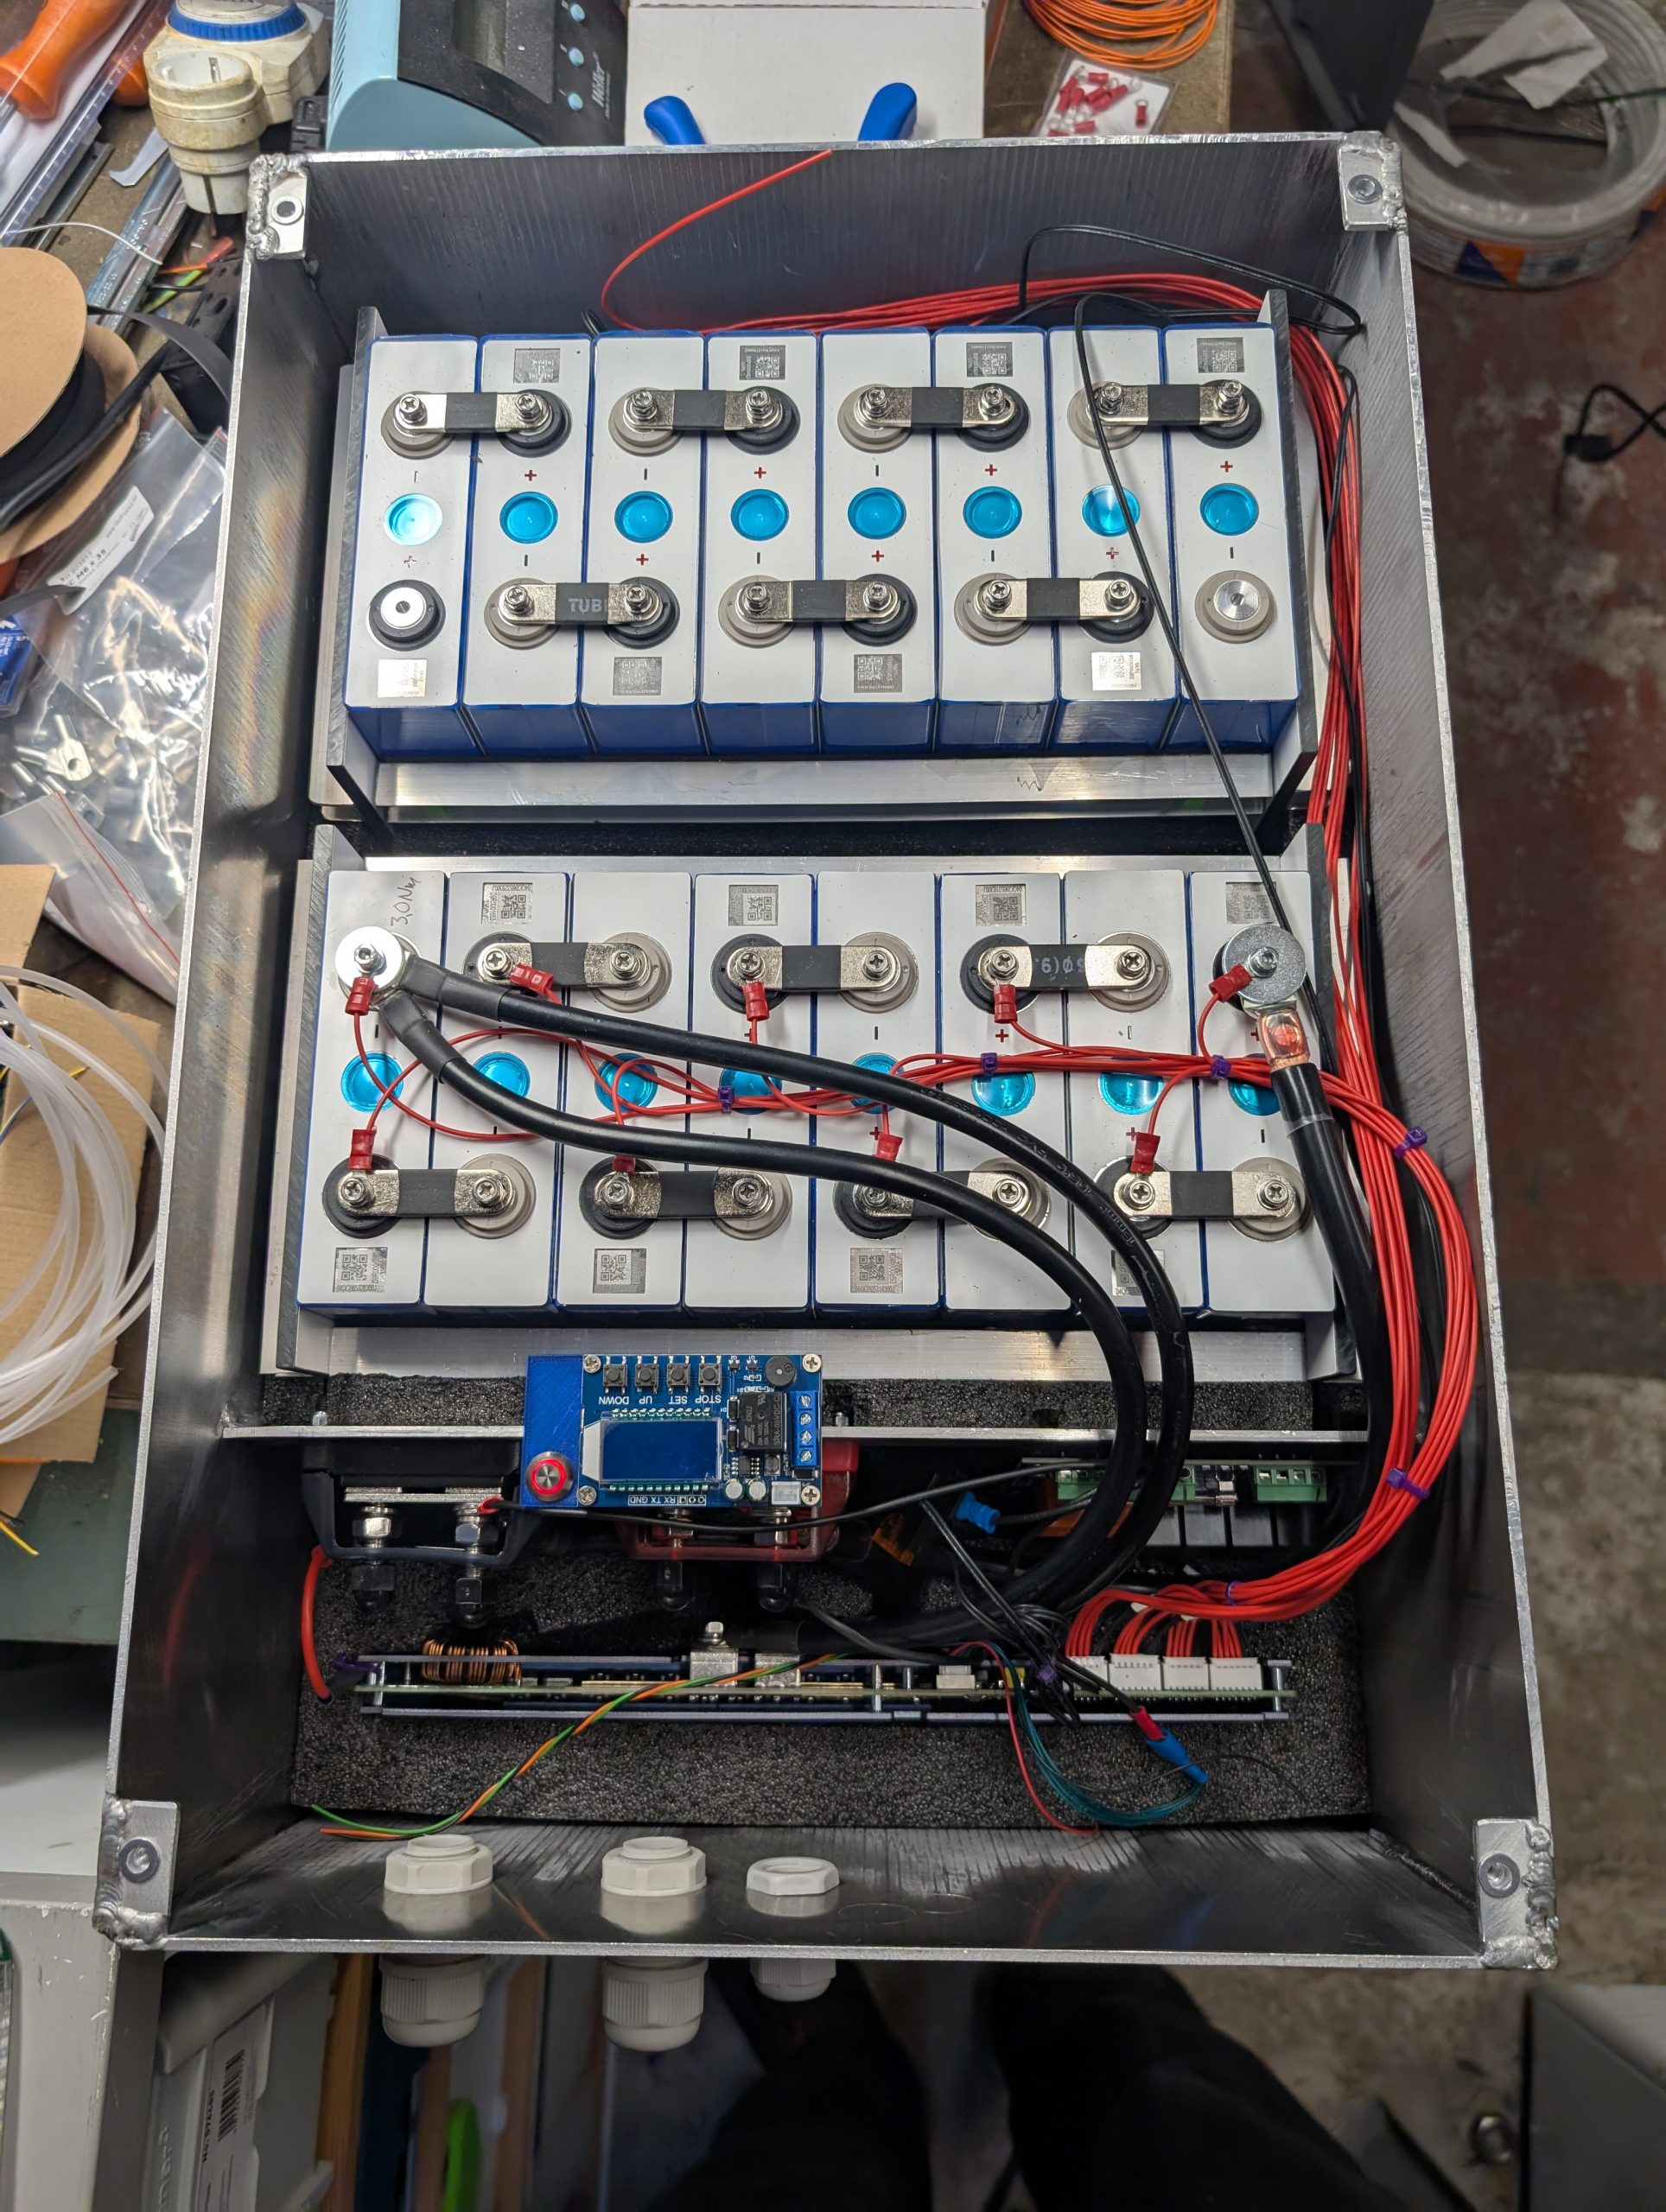
Because I wanted to be able to use the moped as much as possible during the motor upgrade, the box was mounted with only half of the cells connected. This way I could continue using the 24 V motor but finish the battery box.